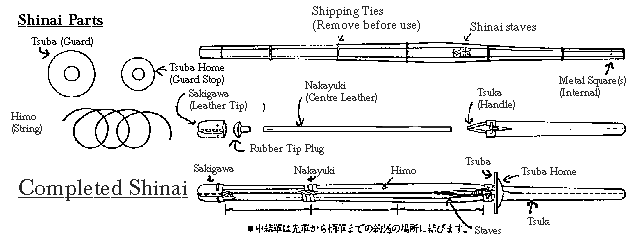
The Shinai, or practice sword, was developed around 1750. It is
constructed of four well-seasoned, highly polished staves of bamboo. A square piece of
metal is wedged into a slot on the inside of the butt of each stave, to keep the staves
aligned. A T-shaped rubber grommet seperates the tips, which are covered by the sakigawa.
The nakayuki keeps the staves from spreading apart in the middle, and the tsuka serves
both as handle and to bind the butt ends together. The himo (string) keeps the
leatherpieces bound together, and indicated the blunt side of the single-edged sword the
shinai represents. The guard, or tsuba, is made of either plastic or whaleskin and is held
in place by a rubber grommet called the tsuba home.
Disassembly
Remove the tsuba and tsuba home. Untie the string at the handle. Pull off the
handle. Pull off the sakigawa and nakayuki with the string. This will save you the trouble
of having to untie more knots than necessary. Hold onto the staves and mark the butt ends
so you remember which is top, bottom, left and right. Then seperate them, being careful
not to lose the metal square near the butt end.
Preparation
This procedure should be repeated every several weeks. be sure to check your shinai
before practice for any any dangerous cracks or splinters in the staves! Sand the staves.
When new pay special attention to rounding the edges as shown. When old, sand away any
splinters or roughness. Coat them with light oil such as gun or sewing machine oil, and
let soak for at least 3 days, preferably a week. While they are soaking, check them daily
and recoat them if the oil has been absorbed. New shinai are dry and need quite alot of
oil. Before reassembling, wipe away any excess oil.

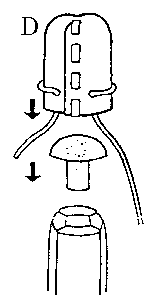
1.Dissasemble,
sand and oil the staves as shown above. Repair or replace staves as necessary. Cracks can
be glued with white glue and then wrapped with packing tape. Assemple the staves in the
order that you marked on the butt ends; don't forget to insert the metal square to keep
them aligned. Slide the handle over the end to keep the assembly together while you work.
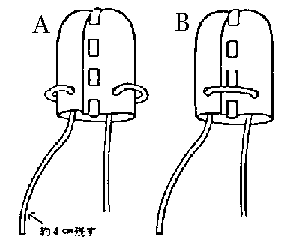
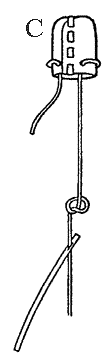
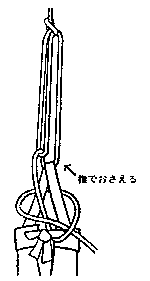
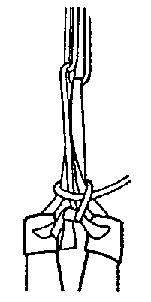
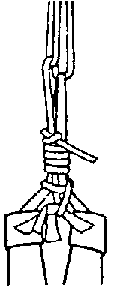
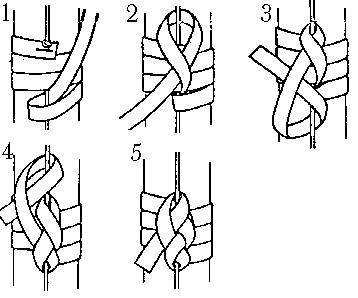
2. Thread the
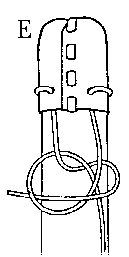
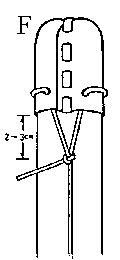
string through the sakigawa as shown in figure A below; figure B is wrong and will tend to
tear the leather. Leave about 2 inches, and tie a knot as shown in figures E and F.